Blog
Step-by-step urine collection: 6 proven procedures

TL;DR:
- Proper specimen collection and handling are essential to prevent contamination and ensure accurate results.
- Clear labeling, correct storage, and transportation protocols maintain sample integrity for reliable testing.
- Continuous staff training and quality verification improve overall specimen quality and reduce errors.
Specimen contamination is one of the most preventable causes of unreliable lab results, yet it still disrupts patient care across clinical settings every day. A single misstep during collection can trigger false positives, false negatives, or outright specimen rejection, forcing repeat testing and delaying diagnoses. Specimen contamination can lead to false results and directly impact patient care. This guide walks healthcare professionals through every major urine collection method with precise, step-by-step instructions, covering preparation, technique, handling, and final verification so your team can eliminate avoidable errors before they reach the lab.
Table of Contents
- Essential supplies and preparation for urine collection
- Step-by-step instructions for the main urine collection techniques
- Best practices for specimen handling, preservation, and transport
- Troubleshooting and special considerations
- Verifying quality and ensuring accurate test results
- A smarter approach: Precision, not just memorization
- Upgrade your practice with reliable collection supplies
- Frequently asked questions
Key Takeaways
| Point | Details |
|---|---|
| Preparation is essential | Gather the right materials and properly label all specimens before beginning collection. |
| Follow step sequences | Using precise, method-specific steps reduces contamination and ensures valid results. |
| Preserve and transport properly | Select the correct preservative and transport method to maintain sample stability for testing. |
| Adapt for special populations | Use pediatric bags, stimulation, or special handling for infants or challenging cases. |
| Verify before submission | Always confirm labeling, volume, and technique to avoid specimen rejection and delays. |
Essential supplies and preparation for urine collection
With the need for accuracy established, it is critical to start with thorough preparation, including the right supplies and processes. Rushing into collection without the correct materials or a prepared patient is one of the most common sources of downstream errors.
Core collection supplies by specimen type:
- Routine urinalysis: Sterile specimen cups with secure lids, gloves, patient instruction sheets
- Urine culture: Sterile wide-mouth containers, antiseptic wipes, biohazard transport bags
- 24-hour collection: Large opaque collection jugs with appropriate preservative, secondary transport containers
- Pediatric: Sterile pediatric adhesive collection bags, skin prep wipes
- Catheterized or suprapubic: Vacutainer system kits, sterile drapes, antiseptic solution
Sterile containers and proper labeling are required for safe and reliable specimens. Do not substitute non-sterile containers even for quick screening collections.
| Specimen type | Container | Preservative needed |
|---|---|---|
| Routine UA | Sterile cup | No |
| Culture | Sterile wide-mouth | No |
| 24-hour | Large jug | Yes (test-dependent) |
| Pediatric | Adhesive bag | No |
| Catheterized | Sterile port tube | No |
Patient preparation matters as much as the container. Verify patient identity using two identifiers before handing over any collection materials. Provide clear verbal and written instructions in the patient’s preferred language. Ensure privacy and adequate time. Label specimens with patient details and use biohazard transport bags for all specimens without exception.
Pro Tip: Pre-label the container before the patient enters the collection area. Labeling after the fact, especially in busy clinics, is a leading cause of mismatch errors.
Store specimens at 2 to 8 degrees Celsius if transport is delayed beyond 30 minutes. Avoid leaving specimens at room temperature for extended periods, as bacterial overgrowth can skew culture and urinalysis results.
Step-by-step instructions for the main urine collection techniques
Having gathered your materials and prepared the environment and patient, follow these detailed steps for each collection method. Standard urine collection techniques include random voided, first morning, midstream clean-catch, catheterized, suprapubic aspiration, and pediatric bag collection.
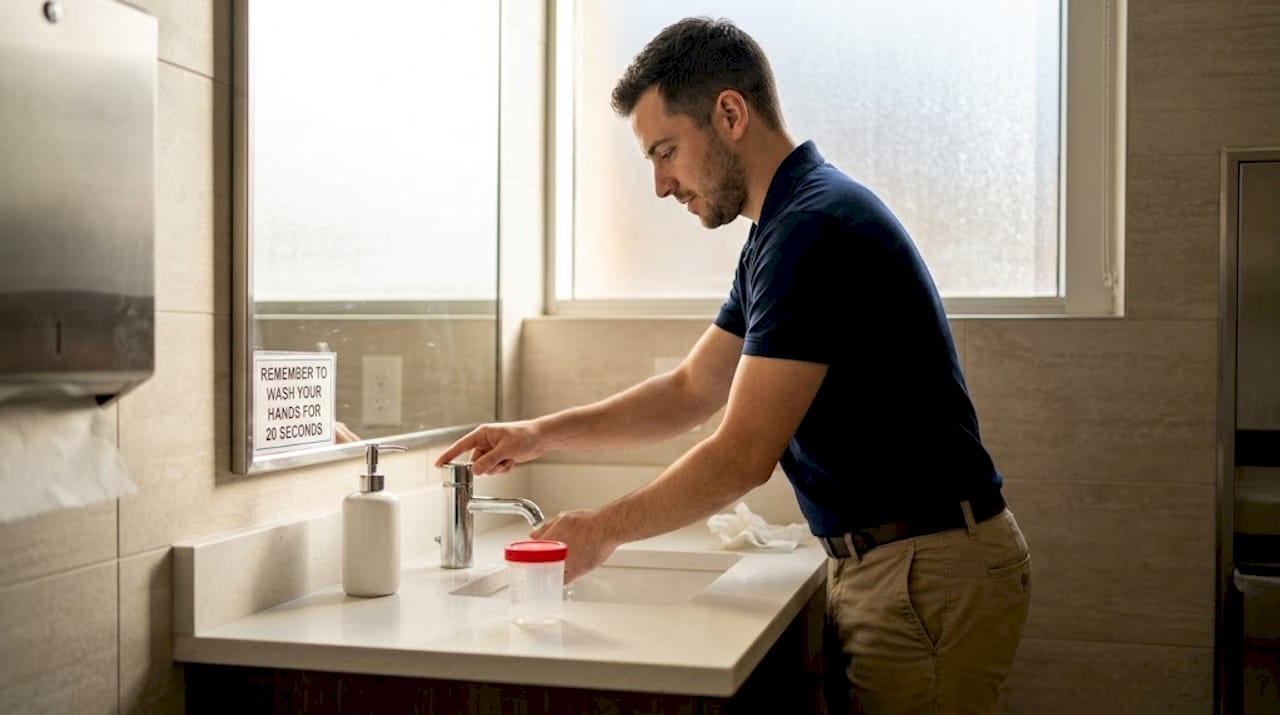
Midstream clean-catch (most common for culture):
- Wash hands thoroughly with soap and water.
- Open the sterile container without touching the inner rim or lid.
- Cleanse the urethral meatus with antiseptic wipes using front-to-back strokes. Specific cleansing methods and collection sequence are critical for reducing contamination in midstream specimens.
- Begin voiding into the toilet for 2 to 3 seconds.
- Without stopping the stream, move the container into position and collect 30 to 60 mL.
- Finish voiding into the toilet, cap the container immediately.
Random voided: Collect at any time in a sterile cup. Used for routine screening. No special cleansing required, but patient should avoid contaminating the container.
First morning: Highest concentration of analytes. Patient collects immediately upon waking, before any fluids.
Catheterized collection: Catheterized specimens require aseptic technique at the designated port. Never disconnect the catheter from the drainage bag. Use a needleless port and a sterile syringe to aspirate 10 to 20 mL after clamping the tubing for 15 to 30 minutes.
Suprapubic aspiration: Performed by a physician under ultrasound guidance. Used when contamination-free specimens are critical, particularly in infants.
Pediatric bag: Clean and dry the perineal area, apply the adhesive bag, check every 30 minutes, and transfer collected urine promptly to a sterile container.
| Method | Best use | Contamination risk |
|---|---|---|
| Midstream clean-catch | Culture, UA | Low |
| Random voided | Screening | Moderate |
| Catheterized | Inpatient culture | Very low |
| Suprapubic | Infants, critical cases | Minimal |
| Pediatric bag | Routine infant UA | Moderate |
Pro Tip: For a more detailed walkthrough of each technique, the detailed urine test guide covers common procedural pitfalls specific to clinical and workplace testing environments.
Always use specimen collection cups that meet CLIA and FDA standards. Sub-standard containers are a silent source of contamination that often goes undetected until results are questioned.
Best practices for specimen handling, preservation, and transport
After proper collection, maintaining sample integrity during handling and transport is just as crucial as the collection itself. A perfectly collected specimen can still produce unreliable results if mishandled afterward.
Preservation guidelines:
- Refrigerate at 2 to 8 degrees Celsius if testing is delayed beyond 30 minutes
- Use boric acid for culture specimens held longer than 2 hours
- Use sodium fluoride for glucose or drug testing when refrigeration is unavailable
- Avoid freezing unless the specific test protocol requires it
Use preservatives for certain specimens and store at proper temperature to maintain sample stability. However, no universal preservative exists; the method depends entirely on the analytical purpose.
| Preservative | Use case | Notes |
|---|---|---|
| Boric acid | Culture | Inhibits bacterial growth |
| Sodium fluoride | Drug testing, glucose | Prevents glycolysis |
| Hydrochloric acid | 24-hour hormone panels | Hazardous; handle with care |
| None (refrigerated) | Routine UA, dipstick | Transport within 2 hours |
Transport requirements:
- Place all specimens in sealed biohazard bags with absorbent material
- Attach the completed requisition form to the outside of the bag, not inside
- Document collection time on the label and requisition
- Never transport specimens in open containers or personal bags
Specimens arriving at the lab without a documented collection time are frequently rejected. This single omission is responsible for a disproportionate share of repeat collections in high-volume clinics.
For additional guidance on maintaining specimen validity throughout the testing chain, the sample integrity guidance resource covers adulteration detection and chain-of-custody requirements relevant to workplace and forensic testing.
Troubleshooting and special considerations
Despite careful preparation, challenges can arise. Addressing these consistently ensures specimen quality across all patient populations.
Common causes of specimen rejection:
- Insufficient volume (less than 30 mL for most tests)
- Unlabeled or mislabeled containers
- Visible contamination (fecal matter, blood from non-clinical sources)
- Improper container type for the ordered test
- Exceeded transport time without preservation
Pediatrics may require specialized collection, and low-volume specimens require specific handling protocols to avoid rejection. For infants, if the adhesive bag fails to yield a sample within 60 minutes, suprapubic aspiration may be necessary.
Special populations:
- Incontinent patients: Use a condom catheter for males or a short-term in-and-out catheter for females rather than relying on pad collection, which introduces high contamination risk.
- Non-cooperative patients: Document refusal clearly and notify the ordering provider. Never attempt forced collection.
- Obese patients: Provide additional cleansing wipes and consider staff-assisted positioning for midstream collection.
Contamination risks are higher in females, and catheter-associated urinary tract infections (CAUTIs) are preventable with proper catheter care and aseptic technique.
Pro Tip: When volume is critically low, consult the lab before discarding. Some rapid immunoassay panels, including many urine testing benefits described for point-of-care use, can run on as little as 10 mL.
Statistic to know: CAUTIs account for roughly 75% of hospital-acquired urinary tract infections. Aseptic catheter technique is not optional; it is the standard of care.
Verifying quality and ensuring accurate test results
Final verification before sending the sample ensures that all your careful work translates into actionable, reliable results. This step is often skipped under time pressure, but it takes less than two minutes and catches most errors before they leave the collection area.
Pre-submission verification checklist:
- Confirm patient name and date of birth on the label match the requisition form.
- Verify the collection date and time are recorded on both the container and the form.
- Check that specimen volume meets the minimum requirement for all ordered tests.
- Confirm the correct container type was used for the test ordered.
- Ensure the biohazard bag is sealed and the requisition is attached to the outside.
- Note any unusual specimen appearance (cloudiness, unusual color, visible particles) on the form.
Midstream clean-catch reduces contamination for culture, and specimen adequacy is crucial for valid results across all test types.
Red flags that warrant recollection:
- Specimen temperature outside the 90 to 100 degree Fahrenheit range (for drug testing)
- Visible sediment inconsistent with the patient’s clinical picture
- pH outside the 4.5 to 8.5 range on dipstick screening
- Creatinine below 2 mg/dL, which may indicate dilution or substitution
Pro Tip: Use the error reduction checklist as a laminated quick-reference card posted at the collection station. Visible checklists reduce omission errors by reinforcing the sequence without requiring staff to rely on memory alone.
A smarter approach: Precision, not just memorization
Having mastered the steps, consider the broader mindset that sets the most effective collectors apart. The best collectors we have seen in clinical and forensic settings are not the ones who have memorized every protocol. They are the ones who notice when something feels off and act on it.
Pattern recognition matters more than rote recall. An experienced collector spots a specimen that is too clear, too warm, or oddly colored before it ever reaches the lab. That kind of situational awareness only develops through real-world feedback, not just training modules.
Moving beyond checklists means building a culture where staff feel empowered to flag concerns and where near-misses are reviewed rather than buried. The most effective programs treat every rejection or recollection as a learning event, not a failure. Reviewing lab best practices regularly keeps protocols current and reinforces the team’s commitment to quality.
Ongoing education is not a one-time event. Refreshers tied to real cases from your own facility are far more effective than generic annual training. Build feedback loops between your collection staff and the lab, and watch error rates drop.
Upgrade your practice with reliable collection supplies
Accurate technique only delivers results when paired with the right equipment. Even the most disciplined collection process breaks down if containers leak, labels fail, or cups lack the sensitivity your protocols require.
At RapidTestCup, we supply CLIA waived, FDA-approved products built for exactly the workflows described in this guide. Our secure urine specimen containers are designed for leak-free transport and clear labeling. For facilities running multi-substance screening, our multi-panel test cups integrate collection and testing in one step. Need a complete setup for catheterized or suprapubic collection? Our urine container vacutainer kits have you covered. Bulk pricing and fast shipping make stocking your collection area straightforward.
Frequently asked questions
What is the clean-catch midstream urine collection technique?
The clean-catch midstream technique involves cleansing the urethral area, voiding initial urine into the toilet, then collecting the midstream portion in a sterile container. Clean-catch reduces contamination for culture and is the preferred method for most outpatient urine culture orders.
How should a 24-hour urine collection be performed?
Start by discarding the first morning void, then collect all subsequent voids for 24 hours, including the final sample at the end of the period, using the correct container and preservative if required. For 24-hour urine collection, collect all urine for 24 hours and use a preservative if the ordered test requires one.
Why are preservatives sometimes added to urine specimens?
Preservatives prevent bacterial growth and analyte degradation during transport or delayed testing, but must be selected based on the specific test ordered. Preservatives are essential for delayed testing, and no single preservative works for every specimen type.
How should pediatric urine specimens be collected?
Most infants and young children use sterile adhesive collection bags for routine specimens, but suprapubic aspiration or stimulation methods may be needed when contamination-free samples are critical. Infants may require stimulation or suprapubic aspiration when standard bag collection fails to yield an adequate sample.
What labeling is required on urine specimens?
Each urine specimen must include the patient’s name, date of birth, collection date and time, and specimen source at minimum. Label specimens with patient name, DOB, collection date/time, and source to meet laboratory and compliance requirements.