Blog
Step by Step Drug Test Collection: 40% Fewer Errors 2026

Nearly 40% of workplace drug tests are compromised yearly due to collection protocol errors, creating costly delays and compliance risks for laboratories and healthcare facilities. These failures stem from inadequate identity verification, improper specimen handling, and incomplete documentation. Verification of donor identity before collection is mandatory and foundational to maintaining test integrity. This guide delivers a comprehensive, compliance-driven step-by-step protocol that significantly reduces errors and improves testing accuracy for laboratory managers and healthcare professionals.
Table of Contents
- Prerequisites And Preparation For Drug Test Collection
- Step-By-Step Urine Drug Test Collection Procedure
- Chain Of Custody And Documentation Requirements
- Specimen Handling, Transportation, And Storage
- Common Mistakes And Troubleshooting During Drug Test Collection
- Expected Outcomes And How To Verify Successful Collection
- Enhance Your Drug Testing Accuracy With RapidTestCup Solutions
- Frequently Asked Questions
Key Takeaways
| Point | Details |
|---|---|
| Standardized procedures reduce tampering | Following consistent protocols cuts specimen manipulation by over 40% |
| Identity verification prevents mix-ups | Government-issued photo ID checks are legally required and eliminate sample confusion |
| Temperature checks validate specimens | Testing within 4 minutes at 32-38°C confirms authenticity and detects adulteration |
| Chain of custody ensures legal defensibility | Documented handling from collection to lab protects test integrity in legal proceedings |
| Proper transport maintains sample quality | Refrigerated storage at 2-8°C preserves specimen validity for 48 hours |
Prerequisites and Preparation for Drug Test Collection
Successful drug test collection begins long before the donor arrives. Your preparation directly impacts specimen integrity and compliance outcomes.
Start with essential supplies: tamper-evident collection kits, chain of custody forms, government-issued ID verification tools, temperature strips, and biohazard transport bags. Each component plays a critical role in maintaining specimen validity. Your drug screening workflow guide should list every required item to prevent last-minute scrambling.
The collection area demands specific setup. Using a clean, private collection area with secured access and visible caller presence reduces contamination and tampering risks by over 30%. Lock doors, remove unnecessary items, and ensure proper lighting. Adding blue coloring agents in toilet water reduces urine dilution attempts by over 40%, deterring common adulteration tactics.
Staff training cannot be optional. Every collector must understand SAMHSA Collection Site Manual and DOT regulatory standards before performing collections. Regular refresher courses keep protocols current and reduce procedural violations.
Verify equipment status daily. Check that temperature strips are functional, seals are intact, and forms are properly stocked. Missing documentation or expired supplies compromise entire collection batches. Review urine specimen collection guidelines to ensure your setup meets federal standards.
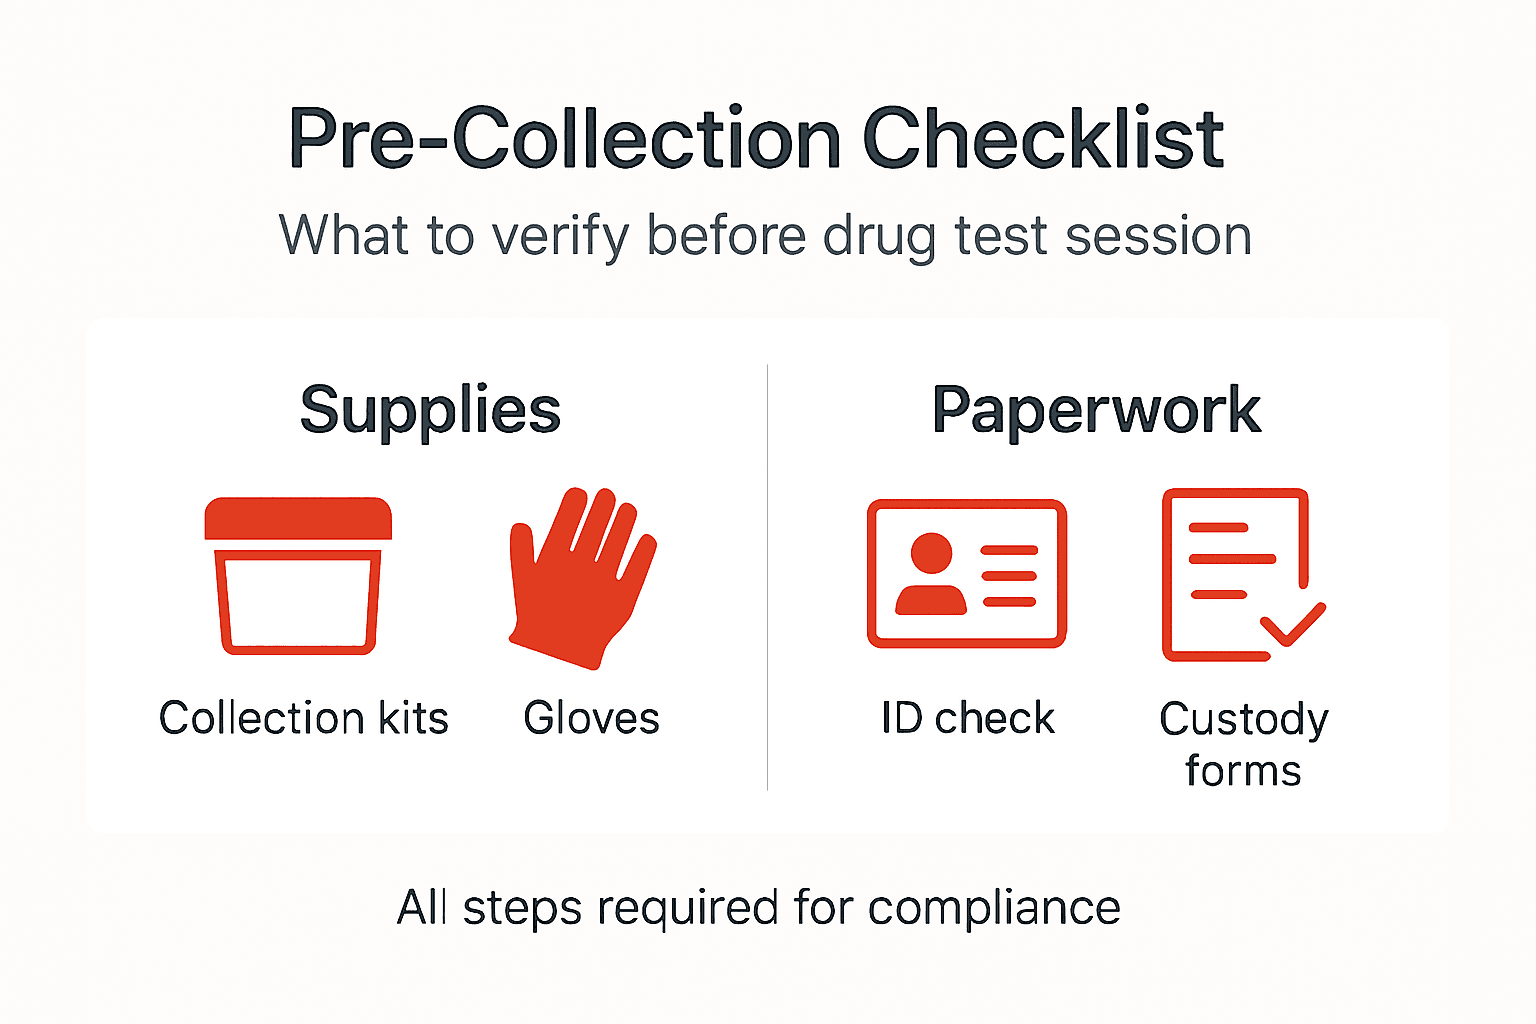
Pro Tip: Create a pre-collection checklist that staff must initial before each session. This simple step catches supply shortages and setup errors before donors arrive, eliminating wasted time and failed collections.
Step-by-Step Urine Drug Test Collection Procedure
With preparation complete, execute the collection using this precise sequence to ensure compliance and accuracy.
Begin with identity verification. Donor identity must be verified with government-issued photo ID prior to specimen collection as per SAMHSA guidelines. Match the photo, name, and date of birth against your documentation. Reject expired IDs or mismatched information immediately. This step prevents sample switching and maintains chain of custody integrity.
Follow these numbered steps without deviation:
- Provide the donor with a sealed collection kit. Allowing donors to open sealed collection kits in your presence increases trust and kit integrity. Watch them break the seal to confirm no tampering occurred.
- Instruct the donor on proper collection technique. Explain minimum volume requirements (typically 45 mL) and emphasize hand washing before and after collection.
- Direct the donor to the private collection area. Remove bags, coats, and personal items that could conceal adulterants.
- Wait outside the collection area but remain immediately available. Listen for running water or unusual sounds that indicate tampering attempts.
- Accept the specimen immediately upon completion. Checking urine sample temperature within 4 minutes (target 32-38°C) confirms specimen validity and detects tampering. Record the temperature reading on your chain of custody form.
- Inspect the specimen visually. Check for normal color, clarity, and absence of foreign materials or unusual odors.
- Tamper-evident seals must be applied immediately after collection to maintain chain of custody and prevent adulteration. Have the donor initial the seal while you witness.
- Complete all chain of custody documentation while the donor is present. Both parties sign and date the form, creating a legally defensible record.
Your step-by-step urine test guide provides detailed visual references for each stage. Keep it accessible during collections for quick consultation.
Pro Tip: Use a timer or watch to track the 4-minute temperature window. Missing this deadline requires a recollection, wasting everyone’s time and raising donor suspicion about your professionalism.
Adhere to compliance best practices by documenting any deviations or unusual circumstances. Note if a donor refuses to follow instructions or if environmental factors affect the collection. These details protect you if results are later challenged.
Chain of Custody and Documentation Requirements
Documentation separates defensible results from rejected specimens. Maintaining a documented chain of custody from collection through testing is mandatory for legal defensibility of drug test results.
Your chain of custody form must capture specific data points:
- Donor full name and identification number
- Collection date and exact time
- Specimen identification number matching the container label
- Collector name and signature
- Donor signature acknowledging the collection
- Tamper-evident seal number
- Temperature reading and time checked
- Any irregularities or donor refusals
Verify that specimen labels match chain of custody documentation exactly. Transposed numbers or misspelled names invalidate results and require recollection. Double-check entries before the donor leaves.
Inspect tamper-evident seals throughout handling. Any breaks, tears, or signs of manipulation compromise specimen integrity. The SAMHSA collection handbook provides detailed seal inspection criteria.
Train your staff regularly on documentation protocols. Even experienced collectors make errors under time pressure. Monthly reviews of actual forms catch recurring mistakes before they become systemic problems. Your drug testing reporting workflow should include quality control checks at every documentation stage.
Store completed forms securely and maintain them for the period required by your jurisdiction, typically 2-5 years. Digital backups provide additional protection against loss or damage.
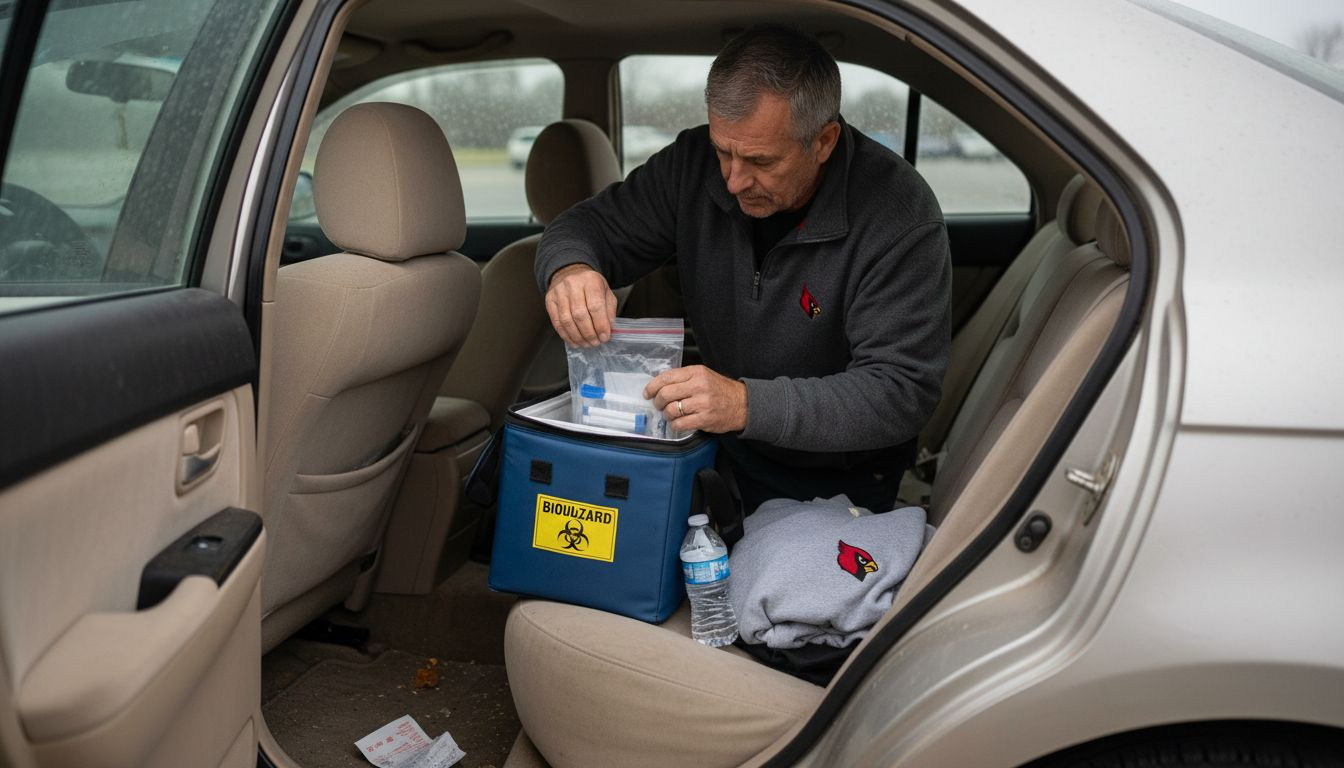
Specimen Handling, Transportation, and Storage
Proper handling preserves specimen integrity from collection through laboratory analysis. Transport specimens sealed in biohazard bags and maintain temperature between 2-8°C to reduce biochemical degradation up to 48 hours post-collection.
Package specimens immediately after collection:
- Place sealed containers in biohazard transport bags
- Include chain of custody forms in the external pouch
- Remove air from bags before sealing to prevent jostling
- Label bags with biohazard warnings per OSHA requirements
Temperature control is non-negotiable during transport. Use insulated coolers with ice packs or refrigerated storage units. Avoid direct ice contact with specimens, as freezing can alter drug concentrations. Monitor cooler temperatures with calibrated thermometers.
Time limits matter critically. The following table shows maximum allowable delays:
| Transport Stage | Maximum Time | Temperature Requirement |
|---|---|---|
| Collection to packaging | 15 minutes | Room temperature acceptable |
| Packaging to refrigeration | 2 hours | Begin cooling immediately |
| Refrigeration to courier pickup | 24 hours | Maintain 2-8°C continuously |
| Courier transport to laboratory | 24 hours | Maintain 2-8°C continuously |
Avoid direct sunlight and heat exposure during transport. Vehicle trunks and unventilated spaces compromise specimen quality rapidly. Your urine test guide includes seasonal transport considerations for extreme weather.
Document transfer times and recipient signatures at every handoff. Gaps in chain of custody documentation void results regardless of proper physical handling. Coordinate courier schedules to minimize storage duration and transportation delays.
Common Mistakes and Troubleshooting During Drug Test Collection
Even experienced collectors encounter problems that compromise test validity. Understanding common errors helps you implement preventive measures.
Identity verification failures top the list of avoidable mistakes. Accepting expired IDs, photocopies, or documents without photos undermines the entire collection. Never waive ID requirements for familiar donors or time-saving purposes. Each collection demands the same rigorous verification regardless of circumstances.
Temperature check omissions create massive compliance gaps. Skipping this step or checking beyond the 4-minute window allows sophisticated adulteration to pass undetected. Set audible timers and position temperature strips where you cannot miss them during the acceptance process.
Incomplete chain of custody documentation leads to automatic sample rejection. Missing signatures, blank fields, or illegible handwriting force laboratories to discard specimens. Delayed specimen processing and transport cause 25-30% of test result invalidations, creating costly recollections and workflow disruptions.
Transport delays degrade sample quality silently. Specimens left at room temperature or stored beyond 48 hours produce unreliable results even with intact seals. Establish backup courier relationships and contingency plans for equipment failures or unexpected closures.
Pro Tip: Conduct monthly mock collections with staff role-playing as donors. These exercises reveal procedural gaps and documentation shortcuts before they affect real tests. Review interpreting urine drug test results to understand how collection errors manifest in laboratory findings.
Address training deficiencies immediately. Collectors who consistently make the same mistakes need retraining or reassignment. Use your drug screening checklist to standardize procedures and reduce individual variation. Consult the IBC drug test collection process for federal standards on error prevention.
Expected Outcomes and How to Verify Successful Collection
Successful collections meet specific criteria that confirm compliance and reliability. Use these indicators to validate your procedures.
Temperature verification provides immediate feedback. Specimens measuring 32-38°C at collection time indicate fresh, unaltered samples. Readings outside this range require immediate recollection and investigation into potential tampering.
Tamper-evident seals must show zero signs of compromise:
- No tears, punctures, or separation at edges
- Initials clearly visible and matching documentation
- Serial numbers legible and corresponding to chain of custody forms
- Color-changing indicators (if present) show no moisture exposure
Documentation completeness separates professional operations from amateur efforts. Every field on chain of custody forms should contain accurate, legible information. Missing data points, correction fluid usage, or unsigned sections invalidate specimens regardless of proper physical handling.
Adulterant detection provides another verification layer. Initial test strips screening for oxidants, pH abnormalities, specific gravity, and creatinine levels catch common tampering attempts. The following table shows normal ranges:
| Parameter | Normal Range | Action if Abnormal |
|---|---|---|
| Temperature | 32-38°C | Immediate recollection required |
| pH | 4.5-8.0 | Flag for laboratory confirmation |
| Specific gravity | 1.003-1.030 | Possible dilution, retest |
| Creatinine | >20 mg/dL | Normal hydration confirmed |
Laboratory acceptance confirms your collection quality. Labs reject specimens with documentation errors, broken seals, or inadequate volume. Track your rejection rate monthly; rates above 2% indicate systematic problems requiring process review. Use guidance from verify successful drug test collection to establish internal quality metrics.
Enhance Your Drug Testing Accuracy with RapidTestCup Solutions
Implementing these protocols requires reliable supplies designed for compliance and ease of use. RapidTestCup offers FDA-approved, tamper-evident solutions that support accurate drug test collection from start to finish.
Our 12 Panel Test ADLTX Cup combines comprehensive drug screening with built-in adulterant detection, catching tampering attempts before laboratory analysis. Temperature strips integrated into each cup eliminate the need for separate equipment, streamlining your collection process.
For maximum coverage, the 15-panel drug test with adulterants screens for expanded drug classes while checking specimen validity parameters. This all-in-one approach reduces invalid results and speeds your workflow.
Standardize your collection supplies with professional-grade urine specimen cups featuring graduated volume markers and secure lids. Consistent equipment reduces training time and improves collection consistency across multiple staff members.
Frequently Asked Questions
When should the temperature of a urine specimen be checked during collection?
Check urine specimen temperature within 4 minutes post-collection to verify it is between 32°C and 38°C, confirming specimen validity. Missing this window requires recollection because the specimen cannot be authenticated. Record both the temperature reading and the exact time checked on your chain of custody form.
What supplies are required for a compliant drug test collection?
Essential supplies include tamper-evident collection cups with temperature strips, chain of custody forms, photo ID verification tools, and biohazard transport bags. Additional items include blue toilet water additive, sealed hand soap, paper towels, and calibrated thermometers. Keep backup supplies readily available to prevent collection delays when primary items run out.
How can I ensure chain of custody documentation is complete?
Chain of custody must document every handling step from donor arrival to specimen receipt at the lab to maintain legal defensibility. Complete all forms while the donor is present, verify signatures match ID, and double-check that specimen labels correspond exactly to form entries. Implement a final review before the donor leaves to catch errors immediately.
What are the signs of specimen adulteration during collection?
Temperature readings outside the 32-38°C range signal adulteration or substitution attempts. Blue coloring in the specimen indicates toilet water dilution, while unusual odors or foreign materials suggest chemical additives. Broken or missing tamper-evident seals before laboratory receipt compromise specimen integrity and mandate recollection.
How soon must specimens be transported to the laboratory after collection?
Specimens should be transported within 48 hours, kept refrigerated at 2-8°C to prevent degradation. Longer delays increase the risk of bacterial growth and drug concentration changes that produce invalid results. Coordinate courier schedules to minimize storage time and establish backup transport options for emergencies.