Blog
Collectors: Read Drug Test Cup Temperature Strips Within Four Minutes


Read the temperature strip within four minutes of the donor handing over the specimen. A valid reading falls between 90°F and 100°F (32°C to 38°C), and anything outside that window means you mark “No” on Step 2 of the Federal Custody and Control Form, document the result, and begin a direct-observed recollection right away.
TL;DR:
- For an out of range result, record No and remarks, then collect again under direct observation with a new kit; both specimens go for testing.
- Record the handoff and reading times, your name, and any measurement method on the Federal CCF, even when the specimen falls within the valid range.
- For a borderline reading, remeasure with a fresh strip or approved thermometer, recording the time and method; if the second attempt fails, document device failure.
- A blank strip usually signals device failure, not an invalid specimen; switch to a fresh cup and strip or approved method, then document the failure.
Table of Contents
- Step-by-step checklist for reading a temperature strip and recording results
- Interpreting readings: in-range, out-of-range, borderline, and measurement errors
- Troubleshooting common problems reading a temperature strip
- Collector best practices to preserve chain-of-custody and maintain reliable temperature checks
- The science behind temperature strips and how they react to body heat
- Differences between various types of temperature strips used in drug test cups
- Why the four-minute window matters beyond the initial reading
- How temperature strips display results: colors and markings
- Guidelines for handling and storing temperature strips to maintain accuracy
- Common errors to avoid when reading temperature strips
- Publisher perspective: why following the temperature-check steps matters
- Where to get compliant specimen cups and temperature strips
- FAQ
- Sources
Step-by-step checklist for reading a temperature strip and recording results
Reading a temperature strip correctly comes down to timing and documentation, not guesswork. Follow the same sequence every time so results hold up under review.
- Confirm the collection cup already has a temperature strip attached, or affix one immediately after the donor hands over the specimen.
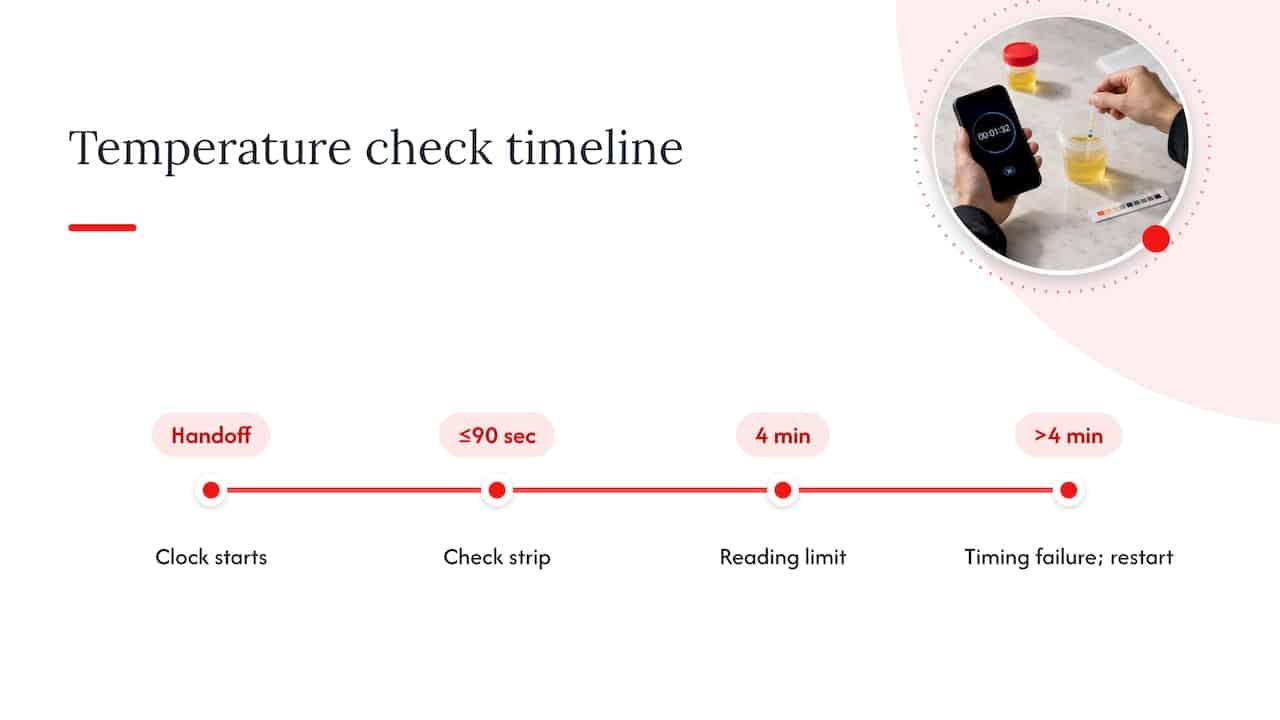
- Start a timer the moment the donor passes you the cup. You have a limited time window to get a valid reading, as federal guidelines require.
- Watch the strip for the temperature band or color change that corresponds to 32°C to 38°C (90°F to 100°F).
- Record the result as Yes or No on Step 2 of the Federal CCF, noting the exact time read and your name as the collector.
- If the reading is “No,” add remarks describing what you observed and prepare to initiate a second, directly observed collection.
- If the strip fails to display any reading, pour the specimen into a fresh cup with a new strip, or use an approved alternate method, and document the device failure on the Remarks line.
Pro Tip: Keep a spare cup and extra strips within arm’s reach at the collection station. A failed strip under time pressure is the single most common cause of a missed four-minute window.
The donor never reads or interprets the strip. That responsibility belongs to you as the collector, and the SAMHSA collection handbook treats this as a non-negotiable part of chain-of-custody integrity. Writing the time down, not just the result, matters because a reading taken at minute five carries no weight under federal rules even if the temperature itself looks fine.
Interpreting readings: in-range, out-of-range, borderline, and measurement errors
Not every reading leads to the same next step. Here’s what each outcome requires:
- In-range (90°F to 100°F): Mark “Yes” on CCF Step 2 and continue the collection normally, including split-specimen procedures where the program calls for them.
- Out-of-range, high or low: Mark “No,” write remarks describing the reading, complete the first collection anyway, then begin a second direct-observed collection with a new kit and a new CCF. The SAMHSA handbook confirms that both specimens get forwarded for testing when this happens.
- Borderline or hard to read: Re-measure immediately with a fresh strip or an approved thermometer method, document the method and the time, and treat it as a device issue if the second attempt also fails.
- Device failure or insufficient volume: Follow the SAMHSA exception procedure, which permits discarding an unreliable specimen and recollecting rather than sending a reading you can’t trust to the lab.
An out-of-range result is not automatically a positive test. It’s a trigger for a specific documented process, nothing more and nothing less. Collectors who skip the paperwork, even when they followed the right physical steps, create a gap that a medical review officer or auditor will flag later. The remarks line exists precisely so that a reviewer months later can reconstruct exactly what happened and why.
Troubleshooting common problems reading a temperature strip
Most temperature strip problems trace back to a handful of repeatable causes:
- Unreadable strip: Switch to a new cup or an approved alternate measurement method, and record the strip or device failure plainly on the CCF Remarks line.
- Missed four-minute window: Treat the reading as invalid for federally mandated collections, document what happened, and move to a direct-observed collection if the program requires it.
- Unusual warmth or suspected tampering: Inspect the specimen for other adulteration indicators (color, odor, foreign material) and follow your program’s protocol for suspicious samples.
- Low volume preventing a reliable reading: Follow insufficient-specimen procedures and log the exact times of each attempt.
Pro Tip: A strip that shows no color change at all, rather than an out-of-range color, usually means the strip itself failed, not that the specimen is invalid. Replace the device before assuming the worst about the sample.
Environmental factors cause more false alarms than deliberate tampering does. A cold collection room, a donor who waited a long time before voiding, or a strip stored improperly can all push a legitimate specimen toward the edges of the acceptable range. That’s exactly why the protocol calls for a second observed collection instead of an automatic positive: the process assumes the first reading could be wrong and builds in a check.
Collector best practices to preserve chain-of-custody and maintain reliable temperature checks
Good temperature-check habits protect everyone involved, from the donor to the employer to the lab that eventually processes the sample.
- Always read and record the strip yourself. Never let the donor interpret or report the result to you.
- Log the exact handoff time and the exact read time, and include your name and any instruments used in the remarks section.
- Stock collection kits with cups that already include temperature strips, plus spare strips, and follow the manufacturer’s activation instructions exactly.
- Write down every observation, not just the final result, so an MRO or auditor reviewing the file later can follow your reasoning.
Consistency across collectors matters as much as getting any single reading right. A program with ten different collectors should produce ten identical documentation trails for the same scenario. That consistency is what makes a CCF defensible if a result is ever challenged in arbitration or litigation.
The science behind temperature strips and how they react to body heat
Temperature strips rely on thermochromic material, a chemical compound that changes color at specific temperature thresholds. Fresh urine leaves the body at roughly the same temperature as the donor, which is why a legitimate specimen reads warm within minutes of voiding. The strip’s chemical layer is calibrated to shift color only within the expected human body temperature range, so a reading above or below that band signals something changed the sample’s heat before or after collection.
Heat transfer happens fast. A cup sitting on a cold counter loses warmth within minutes, and a specimen substituted from a container hidden against skin can run warmer than expected. The strip doesn’t know why the temperature is off, it only reports what it measures, which is why the four-minute window matters so much: wait too long, and the physics of cooling or ambient exposure makes the reading meaningless. Read too early, before the strip’s chemical layer has fully responded, and you risk a false low. The design assumes a narrow, predictable window where the specimen still carries the donor’s actual body heat and the strip has had time to react to it.
Differences between various types of temperature strips used in drug test cups
Not every temperature indicator works the same way. Some cups come with a strip permanently built into the container wall, already positioned to read the specimen the moment it’s collected. Others ship as a separate adhesive strip the collector applies to the outside of the cup right after the donor hands it over, as described in FMCSA implementation guidelines.
Built-in strips reduce handling steps and the chance of a misapplied label, which matters in high-volume clinics or workplace programs. Adhesive strips, by contrast, give collectors flexibility to use a single cup design across different testing programs and replace a failed strip without switching the entire container.
A smaller number of programs use a handheld or clip-on thermometer instead of a chemical strip, particularly as a backup when a strip fails to display a reading. Federal guidance treats these as acceptable alternatives as long as they measure the correct 32°C to 38°C range and never contact the specimen directly. Whichever format a kit uses, the underlying requirement stays the same: a non-contaminating device capable of reporting the acceptable range within the required timeframe.
Why the four-minute window matters beyond the initial reading
The four-minute rule isn’t an arbitrary deadline, it’s the outer limit of when a temperature reading still reflects the specimen as it left the body. Past that point, ambient air, the cup’s material, and room temperature start to dominate the reading more than the donor’s own body heat does.
There’s no extended grace period built into federal guidance for a late reading. A specimen read at minute six doesn’t get a conditional pass, it gets treated as a timing failure, which typically means the collection restarts under direct observation. That’s a harder outcome than an out-of-range temperature in some respects, because it can’t be resolved by simply re-measuring the same specimen.
This is also why collectors shouldn’t wait until the end of the paperwork process to check the strip. The clock starts at handoff, not after you’ve finished labeling the cup or filling in donor information. Building the temperature check into the very first ninety seconds of the collection, rather than the last, is the difference between a program that consistently meets the window and one that scrambles to justify a late reading after the fact.
How temperature strips display results: colors and markings
Most temperature strips use a row of small windows or a single gradient band, each calibrated to a specific degree marking. As the strip absorbs heat from the cup, the corresponding window changes color, typically shifting from a neutral shade to green, blue, or another high-contrast color once the specimen reaches that threshold.
A valid reading usually shows color activation at the marks corresponding to 90°F and continuing through 100°F, meaning you’ll see a solid band of color change rather than a single isolated dot. A specimen that’s too cold will show no color change at all, or color only at the lowest marks. One that’s too warm will light up every marking, including ones above the 100°F line.
Ambiguous results, where the color change looks faint, partial, or stuck between two markings, should be treated the same as a failed reading: re-measure with a fresh strip rather than guessing which side of the line the specimen falls on. Lighting matters here too. Reading a strip under poor light or through a tinted cup wall increases the odds of misjudging a borderline color shift, so collectors should check strips under normal, even lighting whenever possible.
Guidelines for handling and storing temperature strips to maintain accuracy
Temperature strips are chemically sensitive devices, and poor storage can throw off a reading before the donor ever walks into the room. Keep strips and pre-equipped cups in their original packaging until the moment of use, away from direct sunlight, extreme heat, or freezing conditions that can degrade the thermochromic layer.
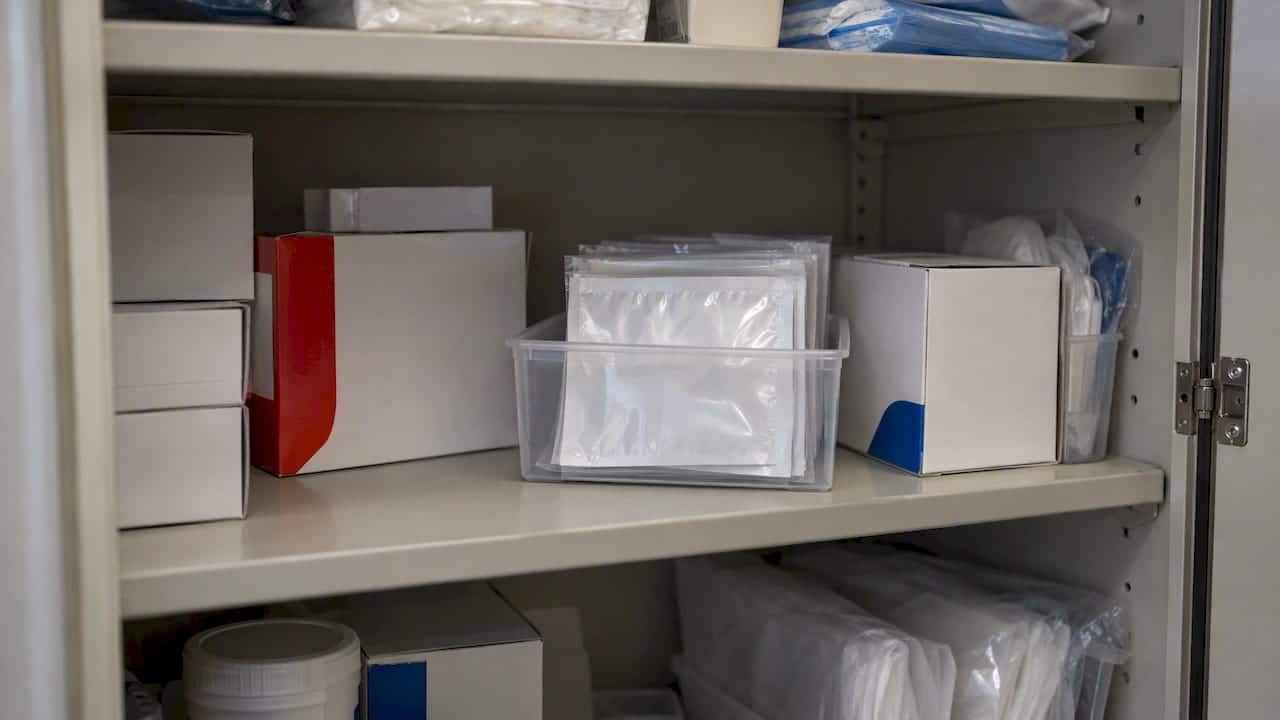
Store collection kits at normal room temperature. A box of cups left in a hot vehicle or a freezing storage closet can shift the strip’s baseline before it ever touches a specimen, producing a false reading that has nothing to do with the donor at all.
Check expiration dates on strips and pre-assembled cups regularly, since the chemical compound that produces the color change does lose sensitivity over time. Rotate older stock to the front of your supply so kits get used before they age out. Avoid touching the strip’s reactive surface directly with your fingers, since skin oils and residue can interfere with the color change. When a kit arrives damaged or the packaging looks compromised, set it aside rather than risk a collection on a strip of unknown reliability.
Common errors to avoid when reading temperature strips
A handful of mistakes account for most temperature-check problems collectors run into:
- Starting the clock too late. The four-minute window begins at handoff, not whenever you happen to glance at the strip.
- Letting the donor report the reading. Only the collector reads and records the result, every time.
- Misreading a partial color change as in-range. A faint or incomplete shift should trigger a re-measurement, not a guess.
- Skipping documentation on a clean reading. Even an in-range result needs the time and collector name recorded on the CCF.
- Reusing a strip or cup after a failed reading. Always move to a fresh device rather than trying to coax a second reading out of a strip that already failed once.
Most of these errors come from rushing. A temperature check takes seconds to perform correctly, but skipping the documentation step or assuming a borderline color is “close enough” creates problems that surface weeks later when a result gets challenged.
Publisher perspective: why following the temperature-check steps matters
Temperature checks exist because they’re one of the fastest ways to catch a substituted or diluted sample before it ever reaches a lab. Skipping the documentation, rushing the four-minute window, or letting a donor read the strip doesn’t just risk a compliance finding, it quietly erodes the entire reason the check exists.
Reliable supplies make the procedural side easier to get right. Collectors working with cups that already include a built-in temperature strip run into fewer failed readings and fewer recollections, which means less wasted labor and fewer donors asked to repeat a collection unnecessarily.
— Justin
Where to get compliant specimen cups and temperature strips
We stock specimen cups with manually applied temperature strips alongside a full range of collection kits built for clinical, workplace, and forensic testing programs. Our shop carries CLIA-waived and FDA-approved options with bulk pricing for labs, clinics, and employers that need consistent supply on hand, not scattered orders from multiple vendors.
For collectors running DOT or split-specimen collections specifically, we carry panel cup configurations and kits sized for those workflows:
- Browse our full shop for specimen cups, dip cards, and temperature-strip-equipped containers in bulk.
- Check our specimen cups with temperature strips for a straightforward, manually applied option.
- Request a custom quote directly through the shop for bulk orders tied to clinical or workplace testing volume.
We provide fast shipping and strive to offer competitive pricing on testing supplies.
FAQ
What temperature range counts as valid on a urine drug test?
A valid specimen reads between 90°F and 100°F (32°C to 38°C) when the collector checks the temperature strip. Anything outside that range requires the collector to document the result and begin a second, directly observed collection.
How soon after collection must the temperature be read?
The collector must read and record the temperature within four minutes of the donor handing over the specimen, according to federal guidance. A reading taken after that window is treated as invalid for federally mandated collections.
What happens if the temperature strip shows no reading at all?
A strip that fails to display any color change typically indicates a device failure rather than an invalid specimen. The SAMHSA exception procedure allows the collector to discard the specimen and recollect using a fresh cup and strip, documenting the failure on the CCF Remarks line.
Can the donor read their own temperature strip?
No. The collector is responsible for reading and recording the temperature strip result on Step 2 of the Federal CCF. Donors never interpret or report the reading themselves.
Does an out-of-range temperature automatically mean a positive drug test?
No, an out-of-range temperature is a documentation and procedural trigger, not a positive result on its own. It requires the collector to mark “No” on the CCF, document remarks, and initiate a second direct-observed collection, after which both specimens may be forwarded for lab testing per SAMHSA guidance.
Sources
- Part 40 §40.65 – What does the collector check for when the employee presents a urine specimen?
- Urine Specimen Collection Handbook – 2024 (SAMHSA)