Blog
Laboratory Drug Testing Checklist for Lab Professionals

TL;DR:
- Running a drug testing program without a structured checklist risks regulatory violations and unreliable results from overlooked gaps. A comprehensive checklist must ensure compliance with certifications, proper specimen handling, valid testing procedures, chain of custody, and quality controls to maintain accuracy and legal defensibility. Regular updates, staff training, and product-specific protocols are essential to sustain operational integrity and meet evolving regulatory standards.
Running a drug testing program without a structured laboratory drug testing checklist is like performing surgery without a sterile field. The stakes are just as real. Regulatory violations, compromised specimens, and legally indefensible results can follow from gaps that a well-designed checklist would have caught on day one. For laboratory professionals and compliance officers in healthcare and substance abuse settings, the complexity of toxicology testing requirements spans accreditation standards, specimen integrity rules, confirmatory testing obligations, and chain of custody documentation. This article gives you a field-tested framework built around those demands.
Table of Contents
- Key takeaways
- 1. Start with regulatory certifications and accreditation
- 2. Verify personnel qualifications and competency assessments
- 3. Validate equipment and perform lot-to-lot verification
- 4. Select and document the appropriate specimen type
- 5. Establish specimen validity testing procedures
- 6. Enforce specimen handling and processing time windows
- 7. Define the analytical testing sequence
- 8. Build a complete chain of custody workflow
- 9. Incorporate Medical Review Officer oversight into post-analytical steps
- 10. Maintain quality control and proficiency testing programs
- 11. Prepare for audits and manage regulatory updates
- My take on where labs actually fall short
- Products that support your lab’s testing checklist
- FAQ
Key takeaways
| Point | Details |
|---|---|
| Regulatory compliance is non-negotiable | CLIA certification under 42 CFR Part 493 covers QC, personnel qualifications, and lot-to-lot verification. |
| Specimen handling windows are critical | Urine samples must be processed within defined time limits to prevent false results and maintain integrity. |
| Confirmatory testing is legally required | Presumptive positives must be confirmed by GC/MS or LC/MS/MS before any employment or clinical action. |
| Electronic chain of custody reduces errors | Digital forms improve traceability and cut documentation errors compared to paper-based systems. |
| Proficiency testing keeps certification active | Annual participation in CMS-approved programs is mandatory for CLIA-certified labs. |
1. Start with regulatory certifications and accreditation
No checklist holds up in a legal or clinical challenge without the proper certifications behind it. For federally regulated workplace drug testing, CLIA regulations under 42 CFR Part 493 govern certification, quality control, proficiency testing, personnel qualifications, lot-to-lot verification, and documentation. These are not aspirational standards. They define minimum lawful operation.
Your laboratory compliance checklist should begin with confirming current CLIA certification status, HHS certification for federal workplace testing if applicable, and any state-level laboratory licensure requirements. Each certification carries its own renewal timeline, so compliance officers need a separate tracking calendar for expiration dates.
Pro Tip: Map each checklist item directly to its governing regulation citation. When auditors arrive, you can demonstrate not just that you comply, but which rule requires it. That specificity builds credibility fast.
2. Verify personnel qualifications and competency assessments
Drug test results are only as reliable as the people generating them. Every testing personnel role in your lab should have documented qualification criteria: education requirements, initial competency assessments, and scheduled re-assessments at six months for new staff and annually thereafter.
Competency assessment is not a one-time onboarding exercise. CLIA requires documented evaluation of each analyst’s ability to perform testing procedures correctly. Your testing preparation checklist should include a competency log for each staff member, tracking assessment dates, evaluators, and results. When personnel change, that documentation is your defense against claims of protocol failure.
3. Validate equipment and perform lot-to-lot verification
Every new lot of reagents, test cups, or calibrators entering your lab must be verified against established performance specifications before use in patient or donor testing. Lot-to-lot verification is a specific CLIA requirement that labs frequently underestimate in scope and frequency.
Your checklist should require documentation of each new lot number, the comparison testing performed, acceptable ranges, and the authorizing signature. Equipment calibration records belong in the same folder. Any instrument that falls out of calibration specification invalidates every result produced since the last successful calibration. That is not a hypothetical. It happens.
4. Select and document the appropriate specimen type
Urine is the most commonly tested specimen in drug screening, favored for non-invasiveness and higher analyte concentrations. But your lab’s substance testing protocols should document the specific matrix being tested and the rationale for its selection.
Here is a brief comparison of the main specimen types:
| Specimen | Detection window | Key advantage | Key limitation |
|---|---|---|---|
| Urine | Hours to weeks (substance-dependent) | High analyte concentration, non-invasive | Susceptible to adulteration |
| Oral fluid | 5 to 48 hours | Directly observed collection | Shorter detection window |
| Blood | Hours to 2 days | Most accurate for current impairment | Invasive, requires phlebotomy |
| Hair | Up to 90 days | Longest historical window | Cannot detect very recent use |
| Sweat (patch) | Up to 14 days (cumulative) | Continuous monitoring | Contamination risk |
Document specimen type selection on your drug testing forms, including the clinical or legal rationale. When a result is challenged, that documentation becomes critical context.
5. Establish specimen validity testing procedures
Before any immunoassay screen runs, your checklist needs a specimen validity testing step. Key urine validity markers include creatinine concentration, pH between 4.5 and 8.0, and specific gravity between 1.003 and 1.030. Specimens falling outside these ranges are flagged as dilute, substituted, or adulterated before analytical testing proceeds.
- Creatinine below 2 mg/dL combined with specific gravity below 1.001 indicates substitution
- pH outside the 4.5 to 8.0 range suggests exogenous chemical adulteration
- Creatinine between 2 and 20 mg/dL with specific gravity between 1.001 and 1.003 indicates dilution
Each of these findings triggers a specific reporting pathway. Your laboratory drug analysis steps should spell out exactly what happens at each branch, who documents it, and what notation appears on the report.
6. Enforce specimen handling and processing time windows
Sample integrity failures are among the most avoidable errors in drug testing workflows. Urine samples must be processed within 1 hour at room temperature or within 4 hours if refrigerated at 4°C. Delays beyond these windows can produce false positives in up to 50% of samples due to bacterial overgrowth and analyte degradation.
Your testing preparation checklist must include a timestamp field at specimen receipt, a documented transfer-to-analysis time, and a refrigeration log for any specimens held before processing. If your lab receives specimens from external collection sites, build transit time into your rejection criteria. A specimen that arrives out of the acceptable window is not testable, and documenting that rejection protects your lab from downstream liability.
Pro Tip: Use a pre-labeled rejection form that collection sites see at intake. When they understand exactly what gets a specimen rejected and why, collection errors drop significantly.
7. Define the analytical testing sequence
Your laboratory drug analysis steps need to follow a defined sequence: initial immunoassay screening, specimen validity confirmation, and then confirmatory testing for any non-negative result. Positive presumptive results must be confirmed by GC/MS or LC/MS/MS with strict chain of custody before any employment or clinical decision is made.
Immunoassay screens are fast and affordable. They are also cross-reactive, meaning structurally similar compounds can trigger false positives. GC/MS and LC/MS/MS separate that ambiguity at the molecular level. Your checklist should identify the cutoff concentrations used for each drug analyte at both the screening and confirmatory stages, the instrument used, and the SOP version in effect at time of testing.
8. Build a complete chain of custody workflow
Chain of custody is not just paperwork. It is the legal thread connecting a biological specimen to a named individual and a reportable result. Electronic custody and control forms reduce documentation errors and improve traceability compared to paper-based systems, and SAMHSA actively recommends their use in federal workplace testing programs.
Your checklist should verify that every specimen transfer is logged with the date, time, purpose of transfer, and the signature of the receiving party. Any gap in that chain can render a result indefensible. For labs conducting forensic drug testing, chain of custody compliance is also the difference between a result that stands in court and one that gets thrown out.
9. Incorporate Medical Review Officer oversight into post-analytical steps
Medical Review Officers (MROs) interpret drug test results alongside each donor’s medical history to prevent inaccurate or unfair conclusions. Their role is non-optional in federally regulated workplace testing programs and increasingly expected in clinical and substance abuse settings.
Your post-analytical checklist should include a step confirming that non-negative results are routed to an MRO before any reporting to an employer or clinical team. Document the MRO’s contact information, the date results were transmitted, and the date the MRO decision was received. That timestamp trail supports both compliance audits and any subsequent legal challenges.
10. Maintain quality control and proficiency testing programs
Quality control is the daily discipline. Proficiency testing is the external validation. Annual participation in CMS-approved proficiency testing programs is required under CLIA for maintaining certification, covering analytes relevant to drug testing and monitoring lab performance over time.
Your laboratory compliance checklist should schedule QC runs at defined intervals (typically each day of patient testing), document acceptable ranges for each analyte, and flag any out-of-range results for corrective action before releasing patient results. Proficiency testing should be scheduled at the start of each calendar year, with results tracked and corrective action documented when performance falls short.
11. Prepare for audits and manage regulatory updates
Regulatory requirements evolve. SAMHSA updates its Mandatory Guidelines periodically. CLIA enforcement priorities shift. New analytes, particularly fentanyl and its analogs, are being added to standard panels by more labs each year. Your checklist needs a formal update review cycle tied to regulatory monitoring.
- Assign one person as the regulatory watch officer for your lab
- Subscribe to CMS and SAMHSA update notifications directly
- Review your drug testing forms and SOPs annually at minimum, or whenever a regulatory change is published
- Train staff on any procedural changes before the new procedure goes live
Your drug testing reporting workflow documentation should reflect the current regulatory version in effect at all times.
My take on where labs actually fall short
I’ve reviewed a lot of lab protocols and compliance programs over the years. The ones that fail inspections rarely fail because they ignored the obvious. They fail because the checklist existed on paper but was never integrated into daily workflow. Analysts skip specimen validity steps under time pressure. Chain of custody forms get batched and filled in later. Proficiency testing gets scheduled but never reviewed for root causes when a result misses the mark.
The other pattern I see consistently: labs invest in the right testing products but write checklists that don’t account for how those products actually behave. Immunoassay cups have specific storage requirements and lot-to-lot variability that a generic checklist template won’t capture. The fix is to build your checklist with your specific products in mind, not around a regulatory document that was written without knowing what’s on your bench.
What I’ve learned is that the best laboratory testing guidelines are the ones that get used every day because they are specific, achievable, and tied to real consequences that staff understand. Compliance isn’t a destination. It’s a habit your checklist either builds or doesn’t.
— Justin
Products that support your lab’s testing checklist
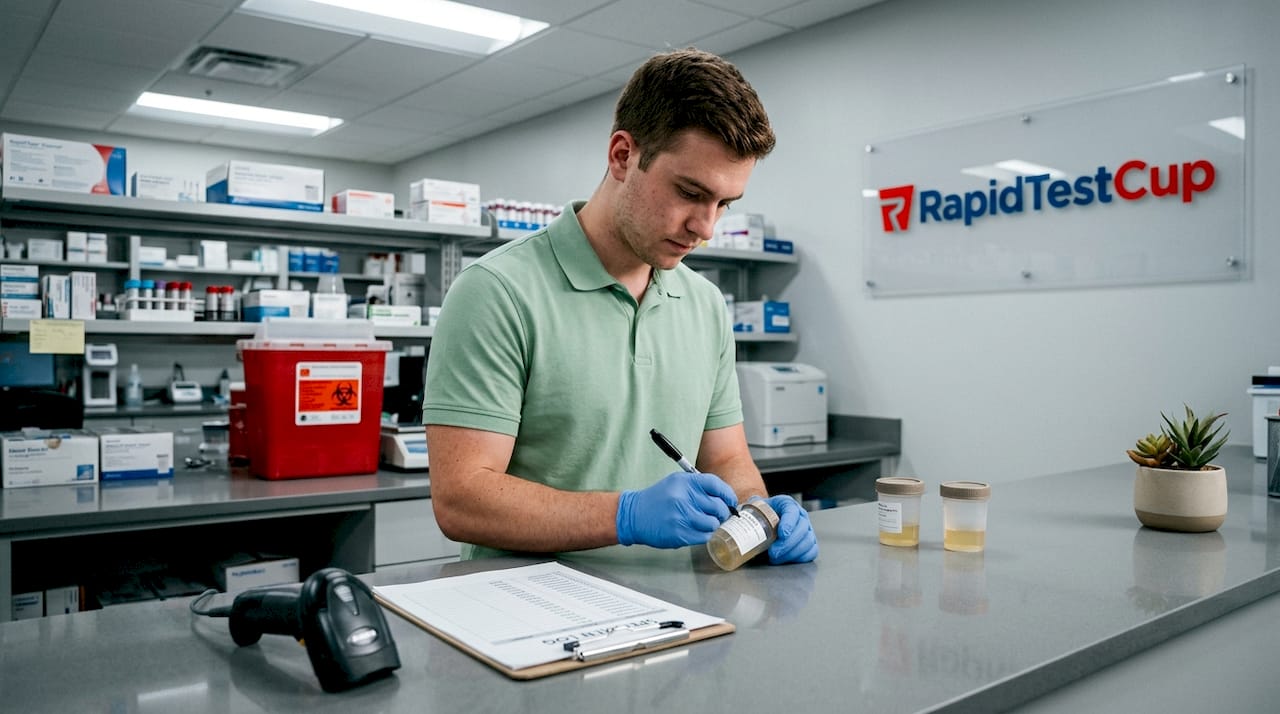
When your laboratory drug testing checklist calls for multi-panel screening with adulterant detection, the product behind that step matters. Rapidtestcup carries the 12-panel ADLTX cup with built-in adulterant checks, which covers the validity markers your checklist requires without adding a separate step. For labs needing broader screening capacity, the 22-panel drug test with adulterants and Zaza covers an extensive analyte range including fentanyl analogs and novel psychoactive substances. Both products are CLIA waived and FDA-approved, making documentation of their use in your compliance records straightforward. Rapidtestcup also offers bulk pricing and quick shipping, which matters when your testing volume demands consistent supply. Check the full catalog at rapidtestcup.com to match products directly to your checklist requirements.
FAQ
What must a laboratory drug testing checklist include?
A complete checklist covers regulatory certifications, personnel qualifications, specimen validity testing, chain of custody documentation, immunoassay screening, confirmatory testing protocols, and post-analytical MRO review. Each step should reference its governing regulatory standard.
How long is a urine specimen stable for drug testing?
Urine must be processed within 1 hour at room temperature or within 4 hours under refrigeration at 4°C. Processing delays beyond these windows can cause false positive rates in up to 50% of samples.
When is confirmatory testing required in drug testing?
Confirmatory testing by GC/MS or LC/MS/MS is legally and clinically required before any employment decision or clinical action is taken based on a non-negative immunoassay screen result.
What is lot-to-lot verification and why does it matter?
Lot-to-lot verification is a CLIA-required process that compares each new reagent or test lot against established performance specifications before use in donor testing. It prevents result errors caused by batch-to-batch variability in test components.
How often should labs participate in proficiency testing?
Under CLIA, labs must participate annually in CMS-approved proficiency testing programs relevant to their testing specialty, including drug testing analytes, to maintain certification and demonstrate ongoing performance accuracy.